- Home
- Gallery and Artists
- About BAMM
- Members Area
- Resources
- Prompts from the Pros
- Prompts from the Pros - Sophie Robins
- Prompts from the Pros - Rachel Davies - Interwoven
- Prompts from the Pros - Lawrence Payne
- Prompts from the Pros - Alex McHallam
- Prompts from the Pros 2 - Escape with Bonnie Fitzgerald
- PftP2 Francesca Busca Eco Artivism - Fabric
- PftP2 Francesca Busca Eco Artivism - Metal
- Prompts from the Pros 2 - Francesca Busca Eco Artivism - Paper
- Prompts from the Pros 2 - Francesca Busca Eco Artivism Plastic
- Prompts from the Pros 2 - Joanna Kessel
- Prompts from the Pros - Helen Miles
- Prompts from the Pros - Julie Sperling
- Prompts from the Pros - Kelley Knickerbocker
- Prompts from the Pros - Marian Shapiro
- Prompts from the Pros - Rachel Sager
- Suppliers
- Materials & Techniques
- History of mosaic
- BAMM Talks and Demos
- Useful links and groups
- Mosaichiamo La Citta Application Form
- Prompts from the Pros
- Workshops/Exhibitions
- News
British Association for Modern Mosaic
School mosaics: Making mosaic
"Our school would like to make a mosaic,
but we don't know where to start."
The following resources have been compiled to help those wishing to create a school mosaic with pupils. Mosaic art is unique in the way it can bring together many people on a single project and the process with the finished work can be extremely rewarding for all of those involved.
Here are some hints and tips to help you achieve a good mosaic project. The list is not comprehensive by any means but it should give you a guide to what is involved.
Many schools are confidently and successfully designing and creating large works of mosaic art – but it is often largely down to one individual teacher (or parent) who has some knowledge of the process. Others can be daunted by the level of knowledge required and worry about health and safety regulations, as they become ever more stringent.
The things to think about:
1) Materials – what are they, where to buy them
2) The Base - What base is the mosaic destined for, mdf, wood, concrete, metal…
3) Method of working – direct, indirect or mesh
4) Preparation – cutting the tiles
5) Using an artist – is it worth bringing in outside help
Mosaic can easily be tied into the National Curriculum; the Greeks and the Romans, patterns, tessellating, symmetry, creativity, dexterity, team work - not to mention having fun! Dull educational establishments and stark play areas can be transformed with bright works of art and give the pupils an immense sense of pride in their achievements and a new respect for their environment.
Where to start
First of all you need tiles – learn about the options in ‘materials’. What they are made out of is the main characteristic of your mosaic.
Then you need to cut them up and think about how they are going to be placed. How they are placed gives your mosaic its unique look.
Materials
The Latin word for cube is ‘tessera’ (plural ‘tesserae’), as the original Roman mosaics were made up from cubes. In those days the choice of ‘cubes’ was strictly limited to natural materials and pebbles – now there is a veritable Aladdin’s cave of wonderful materials available for projects. The ‘unit of currency’ is generally 20 x 20mm tiles, cut into quarters. (It is good to have some helpers enlisted to help nip the tiles for large projects!).
Where to buy
There are a number of dedicated suppliers of mosaic materials, who may even offer schools a discount. They usually have everything you need (including good advice) under one roof and will be able to deliver it to the door of your school. See suppliers on this website.
Choosing the right tesserae to make up your mosaic is very important – considering whether the mosaic will go indoors or out and where it will be sited, wall or floor.
Vitreous glass
Glass is one of the most readily available materials for mosaic work, they are a uniform size (20 x 20mm and 4mm deep) and are generally cut into quarters. As they break they often shed very fine glass shards, so, in advance of the lesson, quarter these tiles, then rinse them through a sieve to wash away any little bits of glass then they are quite safe. You can buy these vitreous tiles already manufactured at 1 x 1 mm (a little more expensive), however because they are machine made they spoil the ‘crafted’ appearance of the mosaic. For expediency you can use a mix of cut and uncut tiles.
If you are allowing older students to cut the tiles, hands and nippers should be completely inside a large transparent plastic bag, away from the working area. Goggles should always be worn, use a brush, and not hands, to remove any tiny pieces of glass from the working area.
The tiles have a ‘right side’ which is flat and a ‘wrong side’ which is ridged (the ridges are there to help the adhesive stick) – policing which side is placed uppermost is one of the drawbacks of using vitreous tiles when working with children. Placing the ridged side uppermost will mean grout is collected in the ridges.
There are a range of about 50 colours (most suppliers do not carry them all) including a more expensive range with gold running through it. It generally comes in paper faced sheets of 225 tiles, (or they are stuck to mesh), soak the tiles off the backing by placing them in warm water. Cost depends on the colour; bright colours, pink, black and gold vein being more expensive then whites, blue, green and beige. Some craft mosaic suppliers will conveniently divide sheets up. Udny’s in London sell large boxes of mixed colours.
In recent years glass vitreous tiles have been produced in China, but although considerably cheaper these tiles are of an inferior quality and because they are heavily ridged on the reverse, they tend to shatter more easily when being nipped. If they are being cut into four, or used whole, this is not a problem, but if they are being shaped they can ‘crumble’. Craft suppliers will sell tiles soaked off the backing for a small premium – (saves a lot of time). Different colours in the range are fairly similar in price.
All vitreous glass is frost proof and waterproof, but not suitable for all floors, as they can be broken in situ (used in bathrooms/showers where shoes are not worn).
SICIS® glass collections are a modern range of opaque, translucent and iridescent tiles measuring 15mm x 15mm by 4mm. There are wonderful and have a great range of colours but are very expensive, a little goes a long way, so it may be worth buying a quarter sheet to jazz up a project. Golds, mirror tiles and other irresistible options are available in abundance, buy just a few and add a little opulence.
Millefiori
Tiny handmade beads of glass with colourful flowery patterns and geometric designs, usually supplied cut into useable sized beads, many suppliers conveniently sort them into patterns or mixes of the same colour. Although expensive they are indispensable for adding detail to mosaic work. The kids love them! One mixed bag will add a lovely dimension to the work.
Smalti
Italian smalti, an intensely coloured enamelled glass available in a wonderful range of colours. It is a traditional material, used by Byzantine and Venetian artists and still manufactured in Italy. Although beautiful, smalti is not particularly easy to use, it is also prohibitively expensive as far as working in school is concerned, but it is useful to know what it is.
Marble
A traditional and expensive material, marble is available in a range of natural colours, cream, white, brown, green, black and tan. Ends of lines are often to be found on auction sites. Try your local stone mason for off cuts.
Pebbles
There is no way to cut these guys, but by collecting lots of colours, shapes and sizes, patterns and pictures can be made by setting them into a wet bed of concrete.
Ceramic tiles
Versatile, can be used anywhere, including rigid floors and onto concrete.
Unglazed ceramic is probably the cheapest of ready made mosaic materials and comes in an earthy, subdued range of natural colours in dimensions of 20x20 and 4mm thick. Again these are used cut into four quarters. They are can be used outdoors, easy to cut because they do not drop any sharp shards and are flat both sides so can be flipped over. Buy the colours you need already soaked off their backing as it is a fiddly and often unsuccessful business. When they are cut a small amount of concrete dust is expelled, for this reason children should wear dust masks if they are actually cutting the tiles themselves.
Glazed ceramic – including ‘kitchen tiles’
The range of glazed mosaic tiles is limited and if the glaze is domed they are difficult to use after they have been cut as the four quarters offer different heights on each side.
Large ceramic glazed tiles (usually 150mm x 150mm), intended for floors or walls of kitchens and bathrooms are great for mosaic work. There are some amazing colour ranges available, (eg ‘Mosa’ tiles from Mosaictraderuk), The tiles are porous on the reverse and not ideally for use outdoors, as they may not survive a really tough winter. You can seal the reverse of each tile with dilute PVA or Johnsons Waterseal (used on patios etc normally) to help protect them. In most circumstances, if the mosaics are in a reasonably sheltered position, and used with the correct adhesives, they will last many years. ‘Rios’ from Reed Harris in London is another good range, and their floor tiles are frost proof.
Chunky, ‘mini porcelain’ glazed tiles (Mosaictraderuk), manufactured size 1x 1 cm, partner well with projects made up from these tiles as they are the same height. Working with larger kitchen tiles in this way is rather cruder than working with square tesserae, but using the mini porcelain is a good way of achieving more detail.
To break up the tiles for the mosaic the tiles are placed between 2 kitchen towels and tapped to break them (wear goggles). The children use the pieces to ‘colour in’ a grand scale drawing they have made. The joy of this style of working is that children can manage this type of work with comparatively little intervention and it is so fast! – a 2m x 1m board can be covered in two hours or so.
The other option for ceramic tiles is recycling old tiles (sometimes a bane as there are not enough of any one colour and they are different heights making grouting a nightmare).
China and other stuff
China adds an element of fun, glazes are not frost proof, so china should not be placed outdoors. Obviously, broken china can be sharp, so take care.
Ceramic pieces
If your school has access to a kiln it is an interesting technique bringing together both media, ceramics and mosaic. Draw ideas onto pre-prepared clay sheets, then cut out, bisque fire and glaze them. Later fill in a background with mosaic.
Cutting tiles
Nippers, wheeled nippers and side biters
There are two types of nippers available for cutting tiles. Side biters – a widely available nipper you may find in the average DIY toolbox, and wheeled nippers especially designed for mosaic making, of these ‘Leponitt’ seem to be the gold standard.
Whether or not you chose to engage the children in the process of nipping depends on their age, the size of the group and the time and patience available!
Methods of working – ‘Direct’ method
Most straightforward - make your mosaic placing the tiles right side up ‘directly’ onto the base you have chosen.
Methods of working – ‘Indirect’ method
For a flat finished surface make it ‘indirectly’ ie placing the tiles face down onto brown paper, to be flipped over later into a bed of adhesive. The paper is later soaked off exposing the front surface of the mosaic. These details of these 2 methods are all widely documented both on the internet and in mosaic resource books.
Methods of working – Working with mesh
Mosaic destined for outdoors usually cannot be stuck with PVA glue, however this method DOES allow you to use child friendly pva. The mosaic is made onto mesh and when complete is embedded in a cement-based adhesive during installation (and is therefore not vulnerable to frost damp etc.).
A large piece of polythene is placed over a drawing and over this is fixed the mesh - the drawing showing through. The tiles are applied using PVA glue, but cutting away from the working area, (into large transparent bags), so that the shards do not fall into the work or mesh. Create details first and background later. Once complete and after 24 hours the work is flipped over and the polythene peeled off so the back can dry. The work can now be installed, either whole, or if large, cut carefully into sections. This method works well for interior and outdoor projects - it could be stuck straight onto a playground wall. It also means if you are working on a large piece, rather than having an enormous board with 20 children crowding around it, each child can work on their own piece of mesh, which is later added to the mosaic.
Bases
If the work will reside indoors, mdf is an ideal base, prime it first with dilute pva (and water) on all sides. Consider adding batons before you mosaic the board as this can make fixing it to the wall later much easier. Outdoors, use marine ply, supposedly weather proof, but not infallible, so prepare it very thoroughly. Paint the back and sides three times with yacht varnish and when it is installed run bathroom sealant around the edges to prevent damp getting behind the mosaic and eventually into the wood. An ideal outdoor base is a metal tray but you must use the correct (flexible) adhesive. Concrete slabs, slate and breeze blocks can also be used, again with an appropriate external tile adhesive. Wedi board, used in bathrooms is lightweight, waterproof and practical (protect vulnerable edges if used outdoors, applying bathroom sealant). It has no inherent strength, so add batons to large sizes of mosaic before making the mosaic, or it will not withstand the additional weight of the mosaic work.
Grouting
Finally, concrete grout is pushed into all the gaps and then cleaned off. This secures the tiles and makes the mosaic waterproof. Don’t mix the grout near children as the dust is noxious, do this outside the classroom, but with sensible precautions in place allow them to help with the grouting and cleaning up, they love the squishy messiness of it all.
Bringing in a Mosaic Artist
Whether or not you decide to bring in outside help will probably depend on your budget, obviously bringing in a mosaic artist will add considerably to the cost, but it will produce great benefits and a better finished result. Bringing in an experience mosaic artist may even save money in other areas as they may have better access to bulk buy materials and could identify more productive ways of working. You should certainly consider using the skills of a mosaic artist if your finished mosaic is to be placed outside and especially if you are planning a floor mosaic as these areas required more demanding skills.
There are a number of professional artists registered with BAMM or you may be able to find someone through a local arts network or the internet. It's usually a good idea to shortlist at least three to talk to. Look at their work, mosaic artists come in many styles and ways of working, look for someone who fits your aspirations. If you can visit a piece of work they have done before, there is no substitute for looking at an actual completed mosaic.
17 TOP TIPS
• Use well-defined areas of colour. Initial drawings should be simple – like a child’s colouring in book.
• Avoid complicated lettering.
• Choose the right adhesive (refer to manufacturers, ask a professional).
• Buy PVA from a builders merchants don’t use ‘school’ PVA – it’s too weak.
• When using a tile adhesive (essential for 3d work and exterior work), try dispensing the adhesive through a disposable piping bag (from kitchen shop) – a lot more accurate/less messy.
• Look at other mosaics (the BAMM website is a good place to start) and see how other artists have overcome the limitations of the medium.
• Try and encourage the children to place the tiles to give the feeling of ‘flow’… children find it hard to get to grips with the idea of laying the tiles relating to each other, ie in lines for the background. In their enthusiasm they would love just to drop them in a random muddle! Even if they only partially achieve this, it really helps to give the mosaic some order and make it more readable.
• Make sure children leave a gap for the grout, place the tiles the right way up, don’t let tiles hang over the edge (they will get knocked off /prevent boards being butted together afterwards).
• Don’t let children leave enormous gaps between the tiles – horrible to grout and looks awful!
• Working on a large scale is much easier – the bigger the better, less problems with awkward gaps.
• Don’t get the board get awash with glue, it will rise up between the tiles leaving no space for the grout. Don’t let it dry, wipe up an excess glue, it dries into a hard bump. Don’t use too little glue or grouting will be like sweeping up breadcrumbs!
• Very small children can make lovely mosaics just working with pattern. Give them a small board each and butt them all together for a colourful patchwork collage.
• Breaking larger kitchen tiles is very expressive, a lot of fun and allows children more creativity as there is not so much to learn about laying. Prepare some difficult areas in advance. Encourage the children to pay careful attention to outlines, so where colours meet a neat line is formed.
• Don’t let the children break the tiles into tiny, tiny pieces (they can get carried away with the hammers), try and use consistently sized pieces.
• Spent lots of time preparing for your workshop, the children will approach it with gusto and do not leave you anytime for cutting supplies of shapes on the day.
• About ten children to one adult is the maximum manageable number.
• Chose your grout colour carefully – never use white grout as it kills the subtlety, a neutral tone (grey) is better.
Whichever method your school chooses be assured it will be a memorable and popular part of the school programme. As a basic beginners guide to mosaic I would recommend The Mosaic Decorator’s Sourcebook (IBSN 0-7153-1139-5) as it gives the basic techniques and has lots of ideas for projects.
Anne Cardwell
With contributions from
Oliver Budd
David Bowers
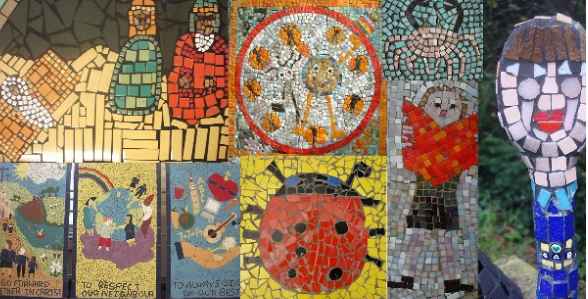
The illustration (top) features mosaic work by the above 3 artists, working in schools in the UK.
![]()
![]()