- Home
- Gallery and Artists
- About BAMM
- Members Area
- Resources
- Prompts from the Pros
- Prompts from the Pros - Sophie Robins
- Prompts from the Pros - Rachel Davies - Interwoven
- Prompts from the Pros - Lawrence Payne
- Prompts from the Pros - Alex McHallam
- Prompts from the Pros 2 - Escape with Bonnie Fitzgerald
- PftP2 Francesca Busca Eco Artivism - Fabric
- PftP2 Francesca Busca Eco Artivism - Metal
- Prompts from the Pros 2 - Francesca Busca Eco Artivism - Paper
- Prompts from the Pros 2 - Francesca Busca Eco Artivism Plastic
- Prompts from the Pros 2 - Joanna Kessel
- Prompts from the Pros - Helen Miles
- Prompts from the Pros - Julie Sperling
- Prompts from the Pros - Kelley Knickerbocker
- Prompts from the Pros - Marian Shapiro
- Prompts from the Pros - Rachel Sager
- Suppliers
- Materials & Techniques
- History of mosaic
- BAMM Talks and Demos
- Useful links and groups
- Mosaichiamo La Citta Application Form
- Prompts from the Pros
- Workshops/Exhibitions
- News
British Association for Modern Mosaic
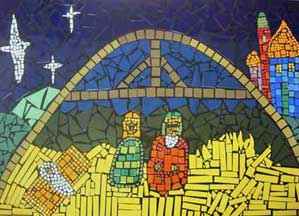
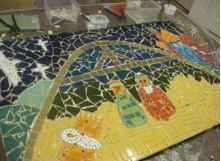
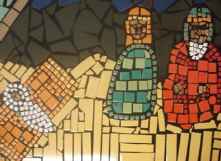
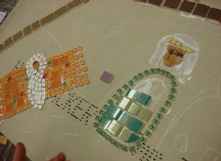
School mosaics: Nativity scene
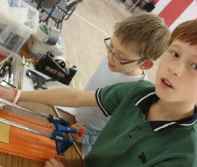
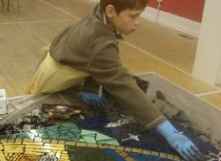
This project is suitable for all ages of children working in groups. It is particularly suitable when you want to mosaic and grout the work in one session.
Smashed wall tiles are used from the MOSA range, they quickly adhere to the surface, meaning the work is stable and soon ready to grout. WEDI board forms the base (used in the building trade), it is an excellent surface as it is waterproof, flat and lightweight. It must be strengthened with batons if used at large sizes.
You need a piece of Wedi board, chalk or charcoal for drawing, pva glue and glue sticks or paint brushes, tiles (MOSA tiles with mini porcelain for detail, both available from Mosaic Trader, a hammer, 2 tea towels and protective goggles, plus a mat to bash on and a brush to clear up nippers.
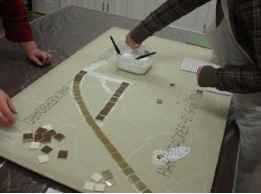
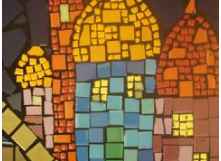
 Draw the design onto the board, make it simple, rather like a picture from a child’s colouring in book.
Choose your colours and place a tile face down in between 2 tea towels, working on top of a mat to protect the floor (an old car mat or carpet off cut). Tap the back of the tile with a hammer, (no need to swing the hammer, the tiles break easily) turn back the top tea towel and remove the pieces that are the right dimension, setting aside smaller bits that might be useful for filling in later.
Try as far as possible to create consistent medium sized bits and avoid using too many of the smaller pieces which will cause the mosaic to look fragmented and gather up a disproportionate amount of grout.
 When all useable bits have been removed and there is no tile left to smash, take away the top tea towel, take the four corners of the lower tea towel, hold together and take to a bin and ease all the left over bits carefully into the bin. Then start with the next tile. It is useful to have lots of boxes, (old shoes boxes etc) to keep the colours separate.
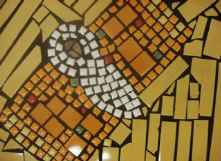
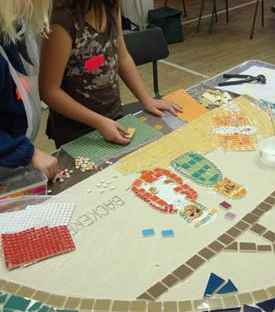 Build up your picture using the medium sized bits, using porcelain mini tiles for detail. It is a good idea to ask the children to place tiles neatly around the outside edges of each colour first, clearly delineating the lines where colours meet and then filling in the middle of each shape. This way the different colours are separated clearly. You can use different shades of tiles of the same colour but try not to let it get too confusing. If you have access to a tile cutter it is great for cutting lots of repeating shapes, like the straw for this scene.
When you have finished, it takes about 45 minutes to dry (depending on how much pva has been used and drying conditions) before it can be grouted. For tips on grouting and general tips on mosaic making refer to ‘Making mosaic with the help of children’, an article on the education page.
© Anne Cardwell October 2008
![]()
![]()